How To Create a Profile in Outlook 2019 for Windows
The word "profile" in this context refers to a collection of settings maintained by Outlook, for a particular user to access a particular mailbox.
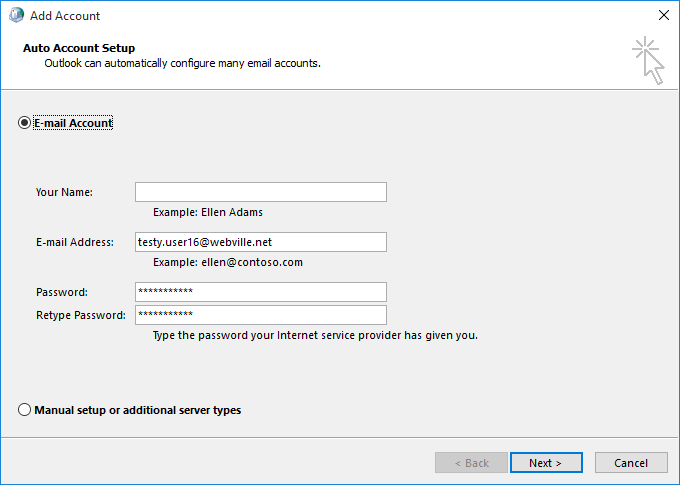
The first time you start Outlook on a new machine, no profiles will exist and the wizard will launch allowing you to create one by specifying your email address, password, and the type of email account. Here is the first screen you'll see. 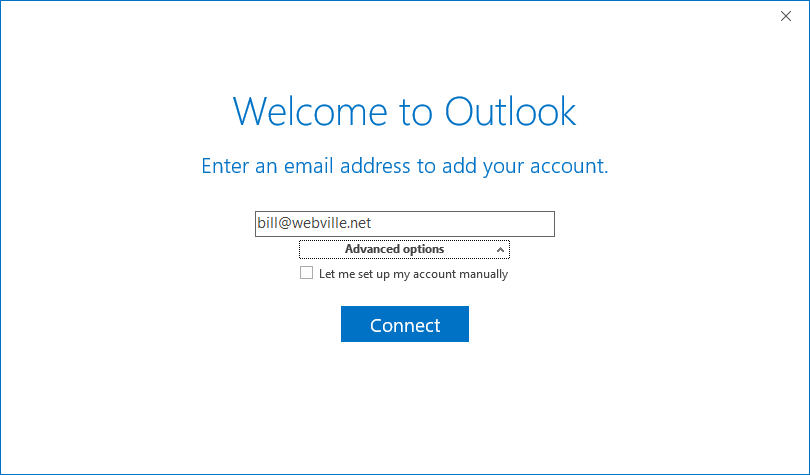
Type your email address and click Connect. When prompted, enter your username and password. Your username is almost always the same as your email address. Here is the next screen.
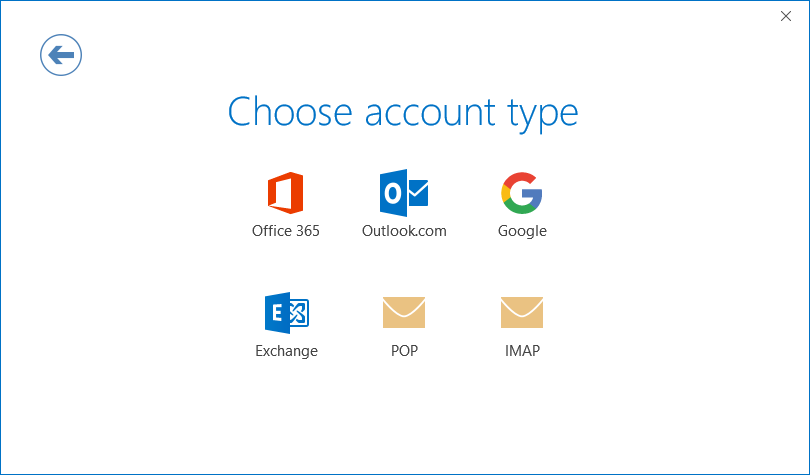
The account type for email provided by Webville is Exchange. Click the Exchange button.
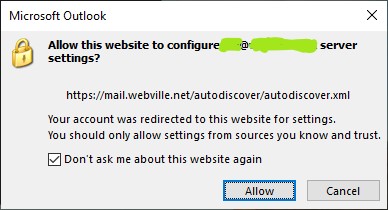
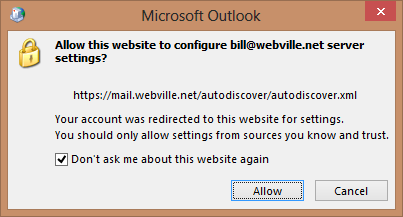
If prompted as indicated in the screen shot above and the security dialog refers to https://mail.webville.net/autodiscover/autodiscover.xml like the screen shot, then check the box "Don't ask me about this website again" and click the Allow button. (If the dialog refers to some other website address, your email domain is not configured properly for hosting by Webville and you'll need to cancel and get help.
That was easy.
If your Outlook already has a profile on your machine, your setup is slightly more complicated. Use the following steps to add a new Outlook profile to your Windows computer, and/or remove an old Outlook profile.
Recently Microsoft has kept things fun by hiding the Mail icon from Control Panel. Instead of finding what we need in Control Panel as we always have for the past 20 years or so, now we need to look deep within Outlook. With Outlook running, Click the File menu, then the Account Settings button to reveal the drop down list of different Account Settings choices. Way down that list will be the option to manage Outlook profiles. That's what we want to do, manage the Outlook profiles on the machine.
When profiles already exist on the computer, the mail setup dialog shown below will appear.
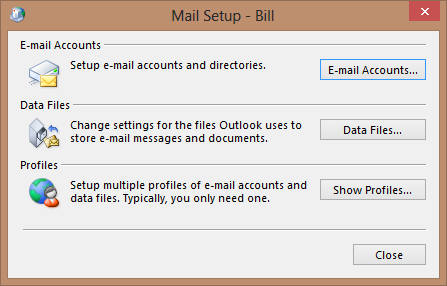
Click the Show Profiles button. The dialog shown below will appear. The profiles shown on your computer and their names will be different from those in the screen shot.
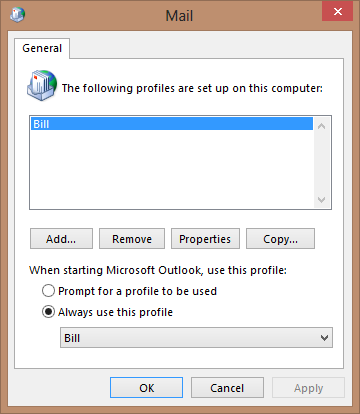
Click the Add button. The following dialog will appear.
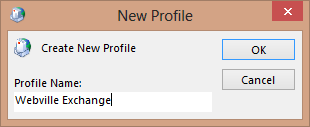
Type a name for the new profile and press Enter or click Ok. The name is only a description and can be anything you like, to help you identify this particular profile.
The following dialog will appear. The name and email address may already be filled in, and they will probably be incorrect.
Type the email address and password for the account you're setting up, the values we supplied you. Click Next. Wait while Outlook attempts to locate the necessary settings and configure your account automatically. This may take a minute. You may be presented with a credentials dialog and a security dialog, like those shown below.
If the security dialog refers to https://mail.webville.net/autodiscover/autodiscover.xml like the screen shot, then check the box "Don't ask me about this website again" and click the Allow button. (If the dialog refers to some other website address, your email domain is not configured properly for hosting by Webville and you'll need to cancel and get help.

At the (Windows Security) credentials dialog shown above, type your login and password. Login is usually the same as email address and is always in the user@domain (dot something) format. If you check the box "Remember my credentials" Outlook will launch into your email without stopping to ask for your password. This may or may not be the behavior you desire, depending on whether other people use your computer.
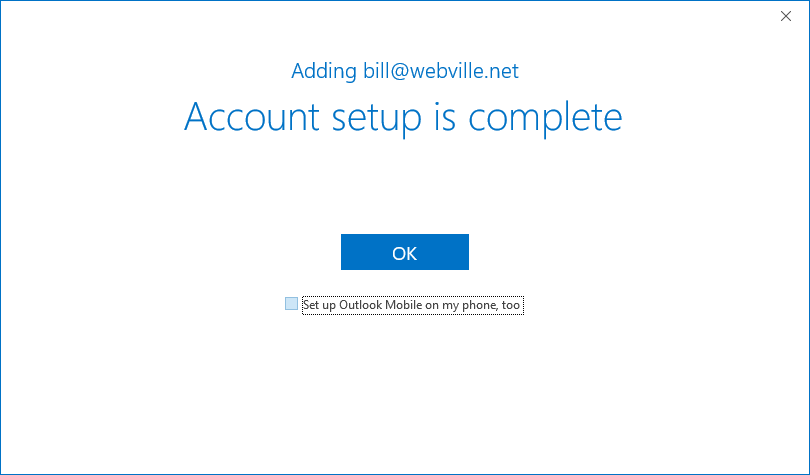
The dialog shown below will appear and your account is almost ready for use.
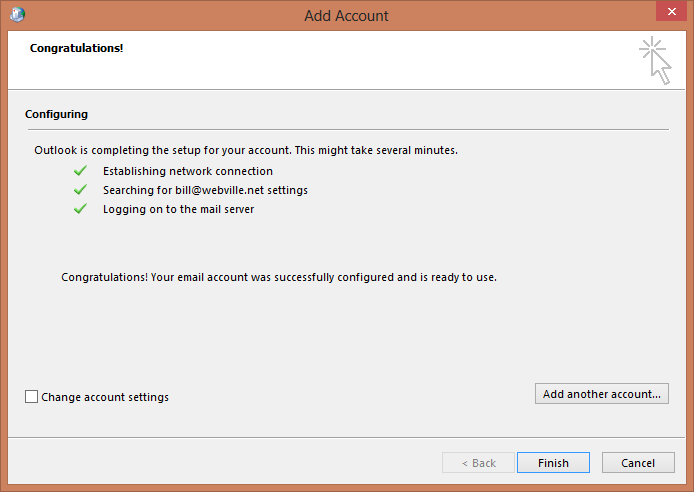
Click Finish but you may not be quite finished yet.
The Mail Profiles dialog will still be open (as shown below) and will show the new profile, along with any others which already existed. If other profiles exist, you'll need to tell Outlook which profile to use.
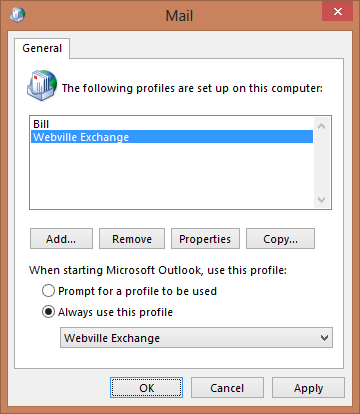
Click the drop down under Always use this profile, and select the new profile from the drop down list, as shown in the screen shot above. Click Ok, close Control Panel and now you're ready to start Outlook.
Enter your username & password if prompted. You're all set.
If you have trouble with these instructions, or comments about how to make this page more useful to other clients, please let us know.