Scheduling Resources
Exchange makes it easy to schedule resources such as conference rooms.
As always seems to be the case, there are several different ways to accomplish the same thing. This page will provide instructions for each of three primary alternatives and briefly discuss the pros and cons of each.
-
Resource Mailbox - The Best Way
-
Public Folders
-
Moderated Public Folders
Resource Mailbox Method - The Best Way
The best way to keep track of your resource is to let us set it up as a "Room" or "Equipment" mailbox. These special mailboxes were introduced in Exchange Server 2010 as an improved way to manage the scheduling of resources.
Room and Equipment mailboxes have their associated user account disabled. You don't log on to these mailboxes in the traditional way. Settings and policies are implemented server side in the mailbox configuration to specify how requests are handled. Screen shots later on this page will illustrate the various settings related to who is allowed to submit requests for the resource, its policies for responding to requests, and the information which will be visible on the resource's calendar. When we set up a resource mailbox for you, these are the options we can configure.
Once the resource is set up, here's how it works generally; When creating a meeting, you can see the resource's availability along with everyone else's in the meeting planner, you invite the resource to the meeting, it automatically accepts if it's available, and the time is booked in its calendar.
Despite what you may have read elsewhere, third-party scripts, costly utilities, custom programming, and special configurations are not required. Exchange used with Outlook does this out-of-the-box. It's part of the basic functionality built-in by Microsoft. All you need to do is invite the resource to your meeting, using the meeting planner.
-
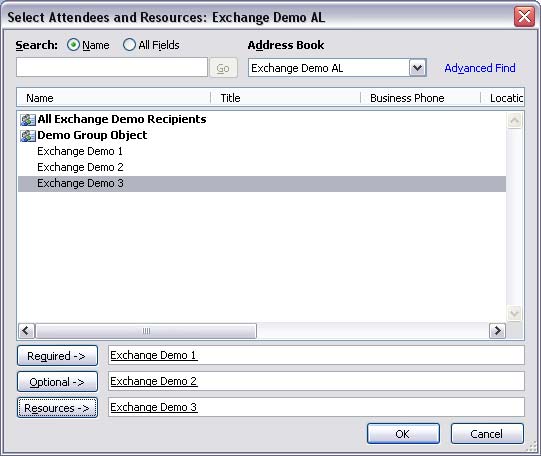
When you invite the resource to the meeting, invite it as a resource, not as a required or optional attendee. See the following screen shot. This dialog is accessed by clicking the To: button in a meeting request.
-
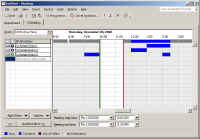
The meeting planner will show the availability of the resource as well as the required and optional attendees. Click to enlarge the following screen shot.
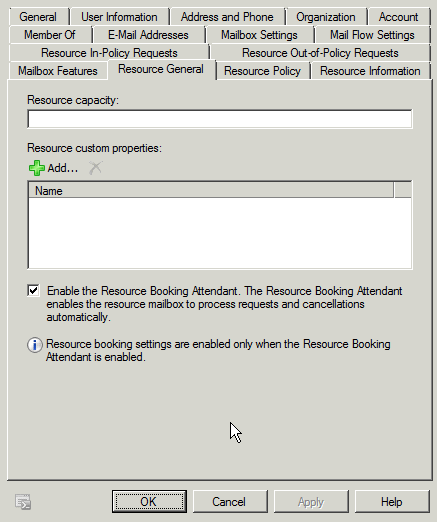
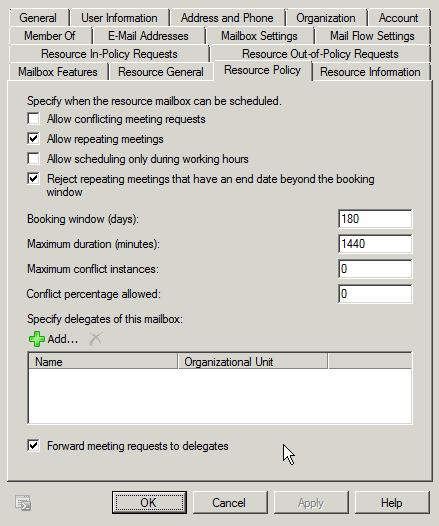
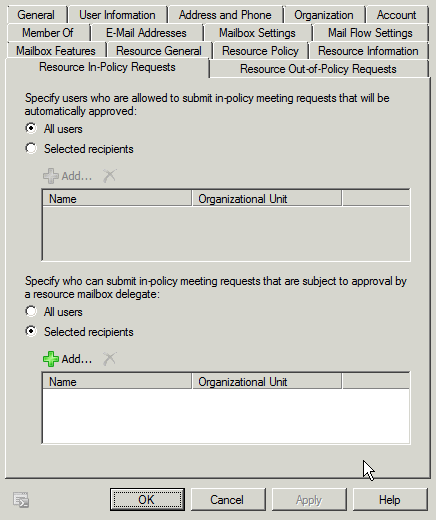
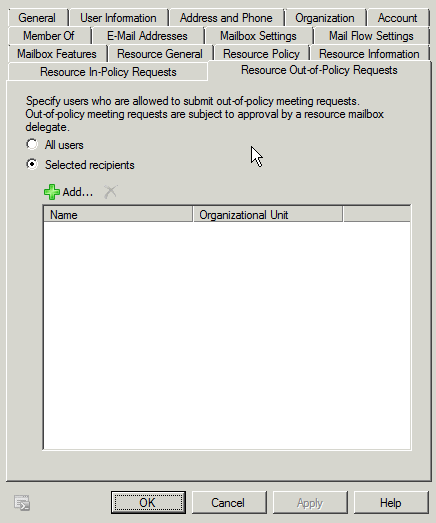
Resource Mailbox Options & Configuration (server side screen shots)
The following screen shots illustrate the various options we can configure to make the resource behave in the way you desire.

Public Folder Method
The only problem with the Mailbox Method explained above is it requires the resource to have a resource mailbox, and that costs money. Microsoft charges hosting providers license fees based on the number of mailboxes, and we charge clients the same way. Using a calendar-type public folder to represent the resource does not require an additional mailbox.
When you create the public folder, specify that it will contain appointment items.
At this point you can book the room directly, by making entries in the public folder. You can manipulate the permissions on the public folder to control who in your workgroup has read / write access. This alone is light-years ahead of having no system at all, but there are drawbacks. The folder does not appear in the global address list, you can't invite the room to a meeting in the meeting planner to automatically book it, and you can't see its availability in the meeting planner.
Moderated Public Folder Method
Another way to solve the resource reservation and booking process problem is to declare a group of people that are responsible for that resource. The moderator(s) resolve resource booking conflicts.
The steps in detail are as follows:
-
Create a new public folder with the calendaring design from your Microsoft Office Outlook Client.
-
Grant the appropriate permissions on this folder to make sure that only employees responsible for this resource have the relevant authorization.
-
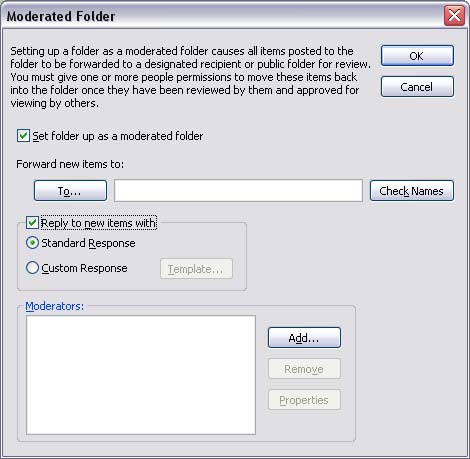
Configure a Moderator for this public folder. Right click the public folder, choose properties, then choose the Administration tab page, then the Moderated Folder button. The following dialog will appear.